Showing posts with label chick. Show all posts

Friday, 6 April 2012

Easter Pom-Pom Pals

Day 39 - Easter Pom-Pom Pals

I've just taken the willow crosses (Day 38) to church this morning.  They were very gratefully received and I can't wait to see them used in the Easter display.  However, the large cross took between five and six hours to make and I've therefore decided that the last two days should be a little less time consuming! Besides it will let me catch up completely on any remaining orders.

I'd not really planned today's project but was confident I'd have everything I'd need to make Easter pom-pom pals.  After seven years running crafts at a toddler group, many days spent crafting with our own children and working as a teaching assistant, I've got quite a stash of craft materials! 


I was pleased to have a couple of able assistants - both eldest and youngest daughters. Our youngest daughter cut circular bases from green glitter self-adhesive foam.  This means you will be able to stick them where you like, if you like. 


There's not too much detail to this craft.  The photos show how we built up the pom-pom chicks and bunnies using pom poms, feathers, stick on googly eyes, wool, felt, pipe cleaners and a selection of funky foam flowers and Easter egg shapes (which I had left over from last year).
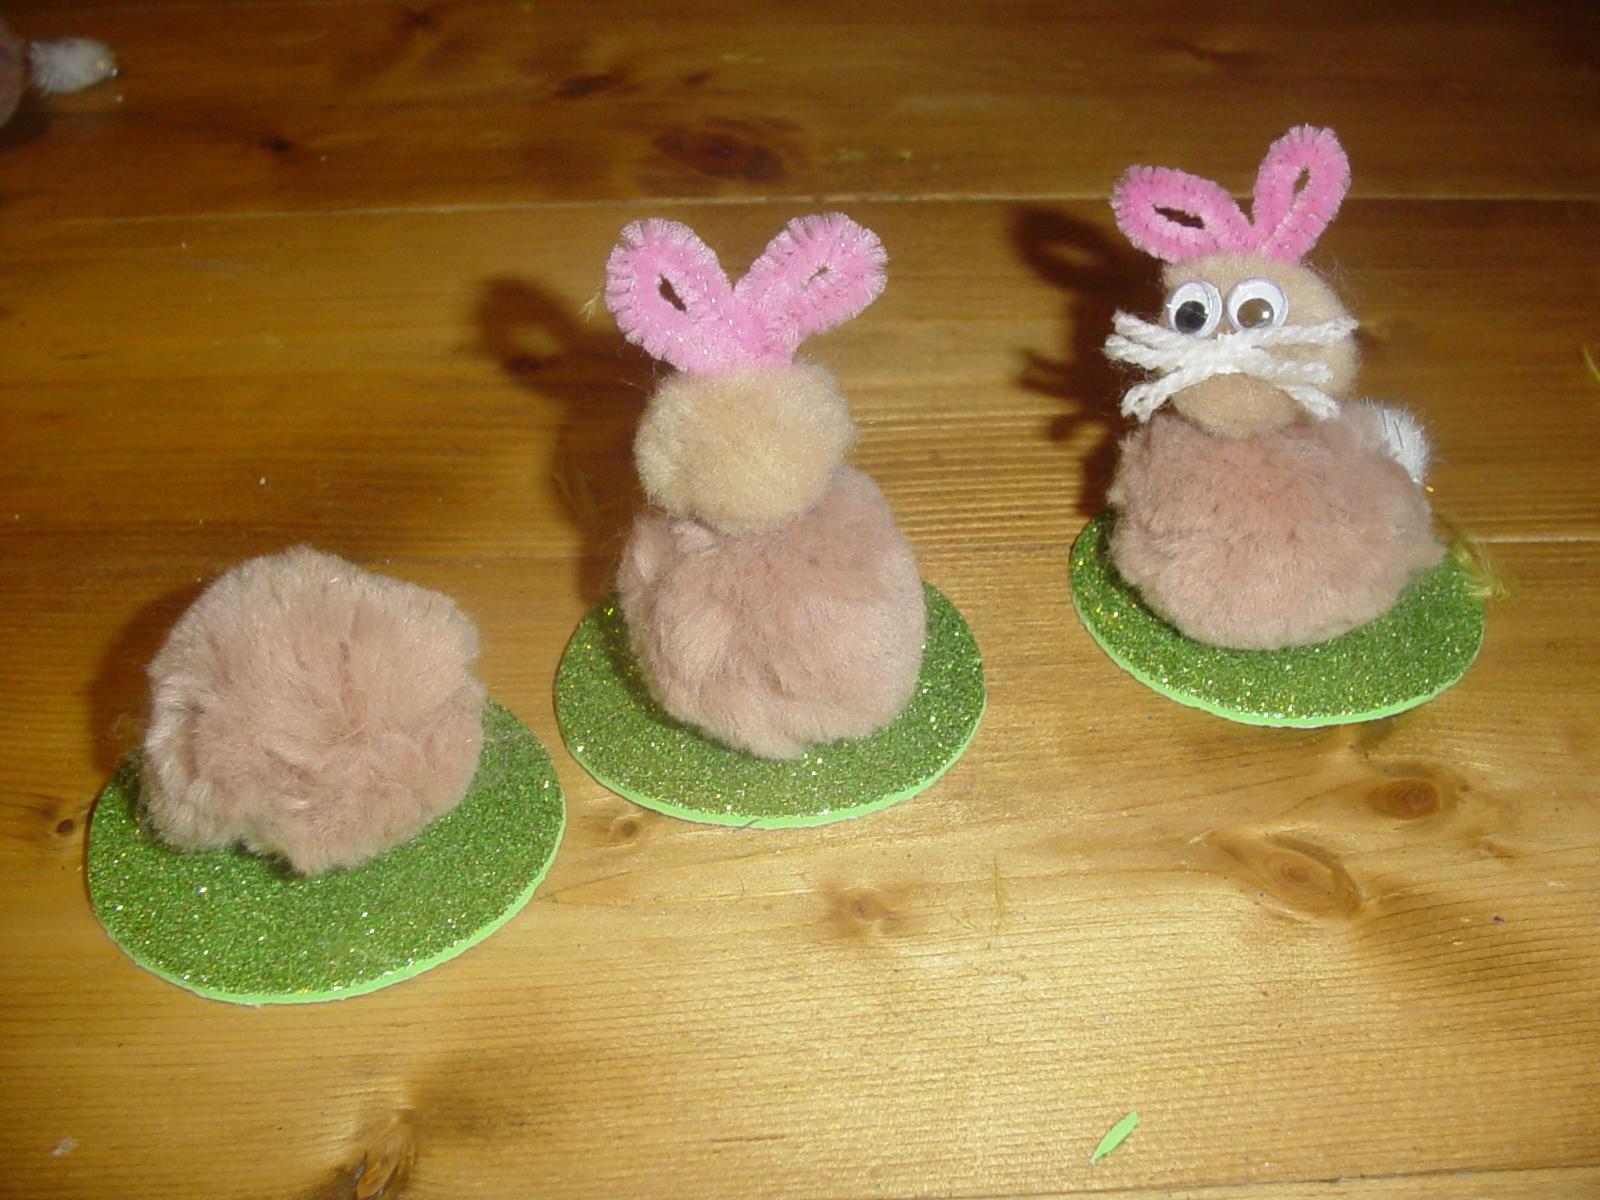


Can you see the tail?


The only tricky bit was attaching the ears.  I cut the pipe cleaner in half and then I've twisted it tightly around the centre of the pom-pom, leaving the ends of the pipe cleaner sticking out of the top. I've then bent the pipe cleaners down to form ear shapes.  


I think they all look quite cute!


My living room is now looking a little less cluttered as I have been able to tidy away almost all the craft materials I have been using over the last forty-six days.  My final 40days challenge - tomorrow - doesn't need much supplies!

I'm still wondering what I'm going to do after the 40days project has finished - any suggestions??

Tuesday, 27 March 2012

Glass Painting

Day 30 - Glass Painting

I've been looking forward to doing some more glass painting. Usually I paint on old coffee jars and fill with sweets for sale at Christmas or summer fairs.  However, I also found some lovely clip top jars that I'd bought ages ago for making peaches in brandy - disastrous! 


I've made up my own designs, with some internet inspiration and this morning I'm painting the outline reliefs.  Hopefully, they'll be dry enough tonight to fill them in. The jars are all soaked in warm water to get the labels off and I've found the easiest way to get rid of the glue residue is rubbing it off with white spirit.


Having wrapped the design into the jar I sometimes use paper towel in the middle to push the paper until it nearly touches the jar.  The coffee jars are ok for this because they are quite straight, however I found transferring the design onto the large jars harder as the shape curves  in at the top. Possibly something worth thinking about when choosing objects to paint onto. 


Here are all the finished outlines.
I decided to use black relief for the small children's jars and a silver relief for the daffodils. The photos show work part through. Once the relief was dried I began filing in the outlines with glass paints.  I have various brands of glass paints, some are better than others for different jobs; some are thick, some runny, some go on opaque to dry translucent, some go on much as it will look dried.   


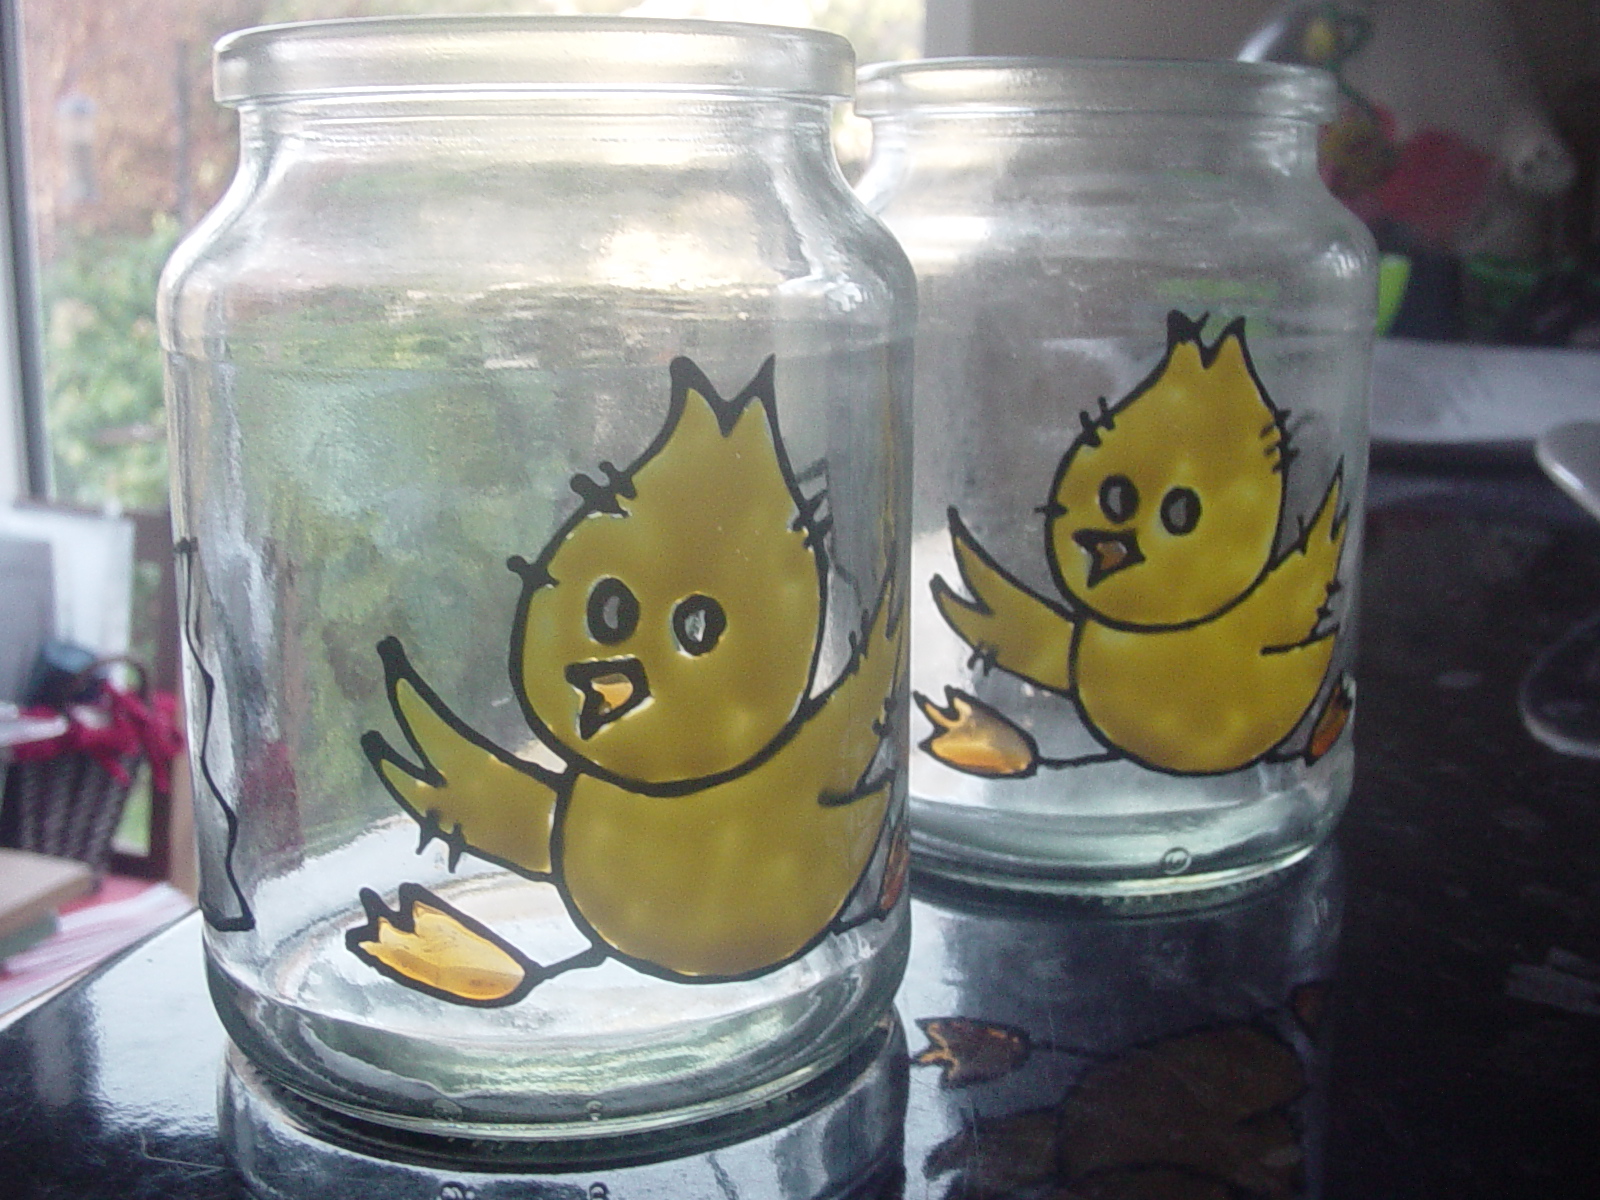
These are how the chicks looked when they'd just been painted.


Though the method is quite like silk painting, unlike silk painting if you make a mistake you can usually correct it, when you're outlining or filling in.


Here are the finished jars......

With a flash on, the colours aren't true.  The bunny is definitely brown - not pink!

Oh I forgot - they're not quite finished, hopefully by Sunday they'll have a few treats inside too! 

These jars look great too, but the paints are still drying - again hope to update another day.


Friday, 23 March 2012

Easter Wreath

Day 27 - Easter Wreath

So, today I was again making use of items I've been meaning to do something with for ages - in fact wreaths I've been saving for use at Christmas. I've stripped down the wreaths and gathered some other materials. I had the netting, chicks and some ribbon already but did buy the eggs and bath puffs.


Did you know what happens when you snip open the tie in the centre of a bath puff? Answer - It all unravels into a long crinkly net tube. I did know this but had not yet figured out what I could use it for, until the 40days project.


I folded the tube of netting, one fold toward the outside of the wreath and the next towards the inside, securing it by wrapping fishing wire around the wreath.  You could probably wrap the netting in other ways - you just need to experiment a little.

Once I got halfway round I realised that I would need two bath puffs.  I just tied one to the next and carried on folding.


When the wreath was completely covered I did use a touch of hot glue to secure it in a few places.


To add a little colour I tied some pieces of purple and lilac netting in a four places around the wreath.  This is as much netting of this colour that I had but you could use more.


I then tied a few lengths of lilac and purple ribbons around the wreath.


To complete this wreath I added some plastic eggs, yellow feathers and small Easter chicks. The feathers aren't even stuck on, they're just poked through the netting.


Saturday, 17 March 2012

Cake Pops

Day 22 - Cake Pops

Thought it was about time I made another edible craft!  I first saw this idea a while ago but have never quite got around to trying it.  After I made the chick cupcakes I kept a little cake leftover and had a practice at making a cake pop recipe.


Cake pops are deliciously moist little bites of cake mixed with some cream cheese frosting.  You can use ready made ingredients - cake and frosting which would be quicker but today I'm going to make them from scratch.


First I've used the following basic recipe to make the cake: butter 120g, caster sugar 150g, 1 tsp vanilla essence, 2 eggs, SR flour 180g, 4 tbsp milk.


While this was cooking I mixed up the following frosting recipe: butter 80g, cream cheese 40g, icing sugar 20g, 1 tsp vanilla essence.


Once the cake had cooled I could break it into small crumbs and then mixed the cake crumbs with the frosting mixture.  At this point you can decide what shape you want to make your cake pops into.  As my challenge has to be Easter themed, I thought I'd simply roll them into balls to make Easter chicks. Once rolled I put them in the fridge for a short while.


When the cake pop balls were a little firmer, I melted a small amount of specially bought candy melts according to instructions.  Again you could probably use other kinds of melted chocolate but I think you'd have to experiment.  The candy melts were bought from Hobbycraft where you can get a full range of colours. Next I needed to stick the lolly sticks into the cake balls. As I've wanted to try this for a while I had already bought lollipop sticks (cake making, not the wooden craft type!). Taking advice from the internet, I put some melted chocolate onto the end of the sticks, pushed the sticks into the cake balls and then left these to set for a while.


Finally, what I assumed would be the most tricky bit!  I melted the rest of the candy melts in a large bowl and then took out the cake pops one at a time and dipped them in the chocolate. After dipping I stood them in glasses.


I didn't expect the cake pops to come out perfectly as this is the first time I've dipped chocolate. I think they're ok! To make small chick heads I've decorated the balls with red icing and food colouring to draw on faces


As I decided to go the whole hog, I also bought some professional looking cake pop covers and ties. I suppose if you are going to eat them pretty soon after then you wouldn't need these. Yummy!!


P.S. I did use the cake pop covers for some BUT the glace icing I'd used and the food colouring started to come off! Oops! I guess if you use fondant icing it'd probably be ok.


Friday, 16 March 2012

Knitted Chicks


Day 21 - Knitted Chicks

When I first mooted the idea of the 40days project my headteacher was the first person to come to me with an idea that she had seen for an Easter themed craft - knitting.  The pattern I've used has come from the site naturalsuburbia.blogspot.com  On the site there are lots of sweet knitting patterns for all sorts of small knitting projects.  I've decided to knit a chick - or two, with eggs and possibly a nest.  


I've bought a fluffy yellow wool for the chicks and some bright multi-coloured wool for the eggs.  Hopefully I'll be able to find some brown wool at home for the nest.  The pattern I'm using is strictly speaking for use with circular needles but I don't have circular needles so I'm following the pattern and sewing up the seams. 

Here is the knitting halfway through the chick body.


This photo shows what the chick body looks like towards the end of the knitting. You can see how it will bend round to make a kind of pear shape.
Once the body was finished I made a couple of wings. (The pattern for all of this is on the naturalsuburbia website.)
I sewed up most of the seam, just leaving a small gap to push the stuffing through. After stuffing the chick's body quite firmly I moulded it into shape.

Here's the chick's body with cute wings attached. 


Peepo! Look what's sitting in the fabric box from Day18!

The original pattern suggests using needle felt to make eyes but I don't have the equipment to do that, so I've simply used thick embroidery thread to make them.  The beak is made from a small loop of wool which is then woven with the same thread.

I haven't quite got around to making the eggs yet - I've got another project I need to complete tonight.  Depending on how quickly that one goes, some eggs might magically appear before the night is out.


Saturday, 3 March 2012

Cupcakes

Day 10 - Easter Chick Cupcakes

As it's my daughter's birthday party today and I'd be making cupcakes anyway, I had decided to double up and make some Easter chick cupcakes.  I baked traditional vanilla flavoured cupcakes but the most fun was in the decorating.


I've used ready made yellow fondant icing to make the chicks. I've rolled the icing into larger and smaller balls and then used a touch of water to join them on top of each other.  Next I rolled out the icing and cut it into tiny wings for the chicks - this was a little labour intensive, 46 wings required for 23 cakes - again sticking with a bit of water.  


To make the beaks I used small scissors to make a little nick in the 'head' ball. The chicks were finished off with a bit of food colouring for inside the mouth and the eyes.


Once I'd made about thirteen chicks I had to stop to take my daughter to Fired4U for her party! They all had a great time enamelling jewellery and then came back for tea.  So, I didn't get back to the cakes until about 8 o'clock.  

I 'd made some pale green butter icing which I piped onto the cakes and then sat the chicks on top.


Luckily my daughter has a cake stand to display them on.  They're all going to church tomorrow - hopefully there will not be many left.  Don't they look too cute to eat?!!